Microsoft Teams is a widely popular collaboration platform used by organizations of all sizes for seamless communication and teamwork. With its versatile features and integrations, Teams can help increase productivity and streamline workflows.
In this blog post, we will explore five extraordinary productivity tips for Microsoft Teams that can help you work more efficiently and effectively. These tips will help you save time and resources and will allow you to get the most out of Microsoft Teams.
Let’s dive in!
Tip # 1: Pin Channels and Chats to Enable Quick Access to Them
When you have channels, chat tabs, or files and folders that you frequently access, you can pin them to the top of the Team’s workspace pane, chat pane, or files tab.
Pinning a chat, channel, or folder in Teams can be useful because it allows you to quickly access important conversations or files without having to search for them every time. By pinning them, they will appear at the top of your chat or files list, making them easy to find and access. This can save you time and make your work more efficient.
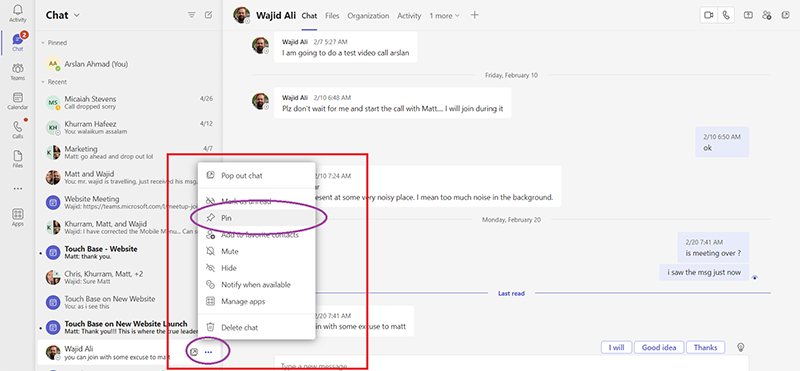
How to Pin a Chat or Channel in Microsoft Teams?
Whether you’re pinning a chat or a channel the steps are the same.
Select the ellipsis beside the channel or chat and click on “Pin” to secure it to the top of the pane.
You can see the selected chat has been pinned to the top of the Teams pane.
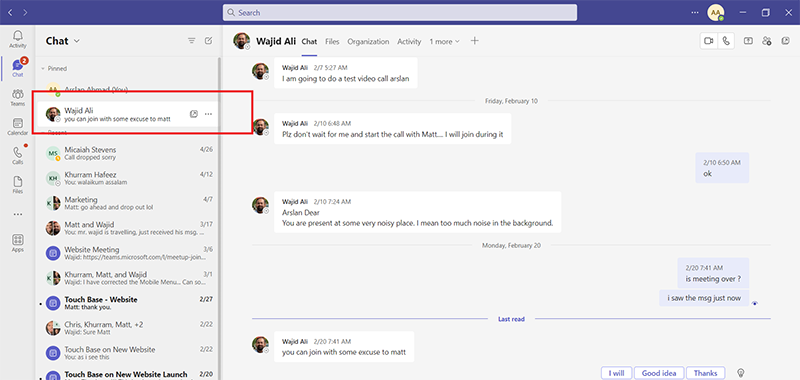
Now, this chat (or channel for that matter) will remain pinned at the top of the pane until you unpin it.
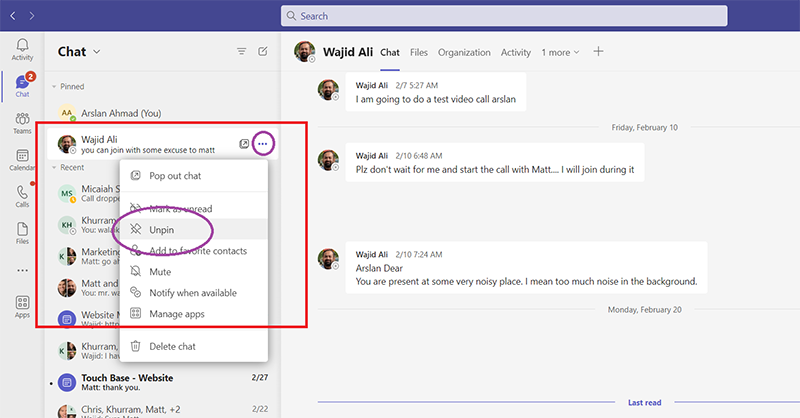
How to unpin a Teams Chat or Channel?
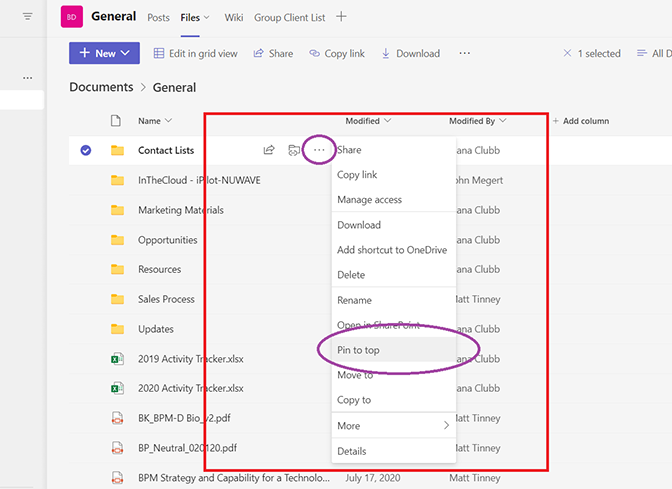
How to Pin a Folder or File in a Teams Channel?
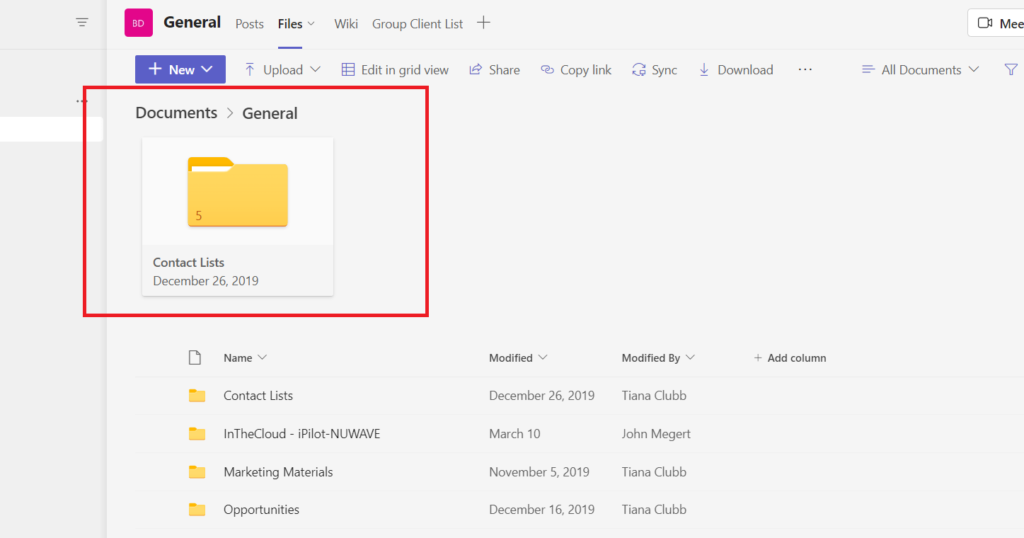
If you would like to pin a folder or important work item or document, access the channel the items are housed in and select the Files tab as shown:

Now, use the ellipsis beside the item to access more options and choose the option, “pin to top”
The item will now be secured to the top of the file listing for quick and easy access in the future. You can see it here:
Tip # 2: Leverage OneDrive Connectivity
OneDrive connectivity in Teams can offer several benefits for users:
- It allows you to easily share and collaborate on files stored in OneDrive directly within Teams. This can be particularly useful if you frequently work on files with your team, as it eliminates the need to constantly switch between the two platforms.
- Leveraging OneDrive connectivity ensures that all team members are working on the most up-to-date version of a file, as changes made by one team member are automatically synced and updated for everyone else. This can help to avoid version control issues and confusion over which version of a file is the most recent.
- Finally, using OneDrive connectivity in Teams can also provide an added layer of security for your files. OneDrive offers robust security features, including automatic backups and file version history, that can help to protect your data in case of accidental deletion or data loss.
How to Seamlessly Use OneDrive in Teams?
From the “Files” view, you can access your personal OneDrive cloud storage that houses all of your private work files and documents.

This allows you to work on your private work files and documents while remaining connected to your organization and to other colleagues.
Here’s the main productivity hack:
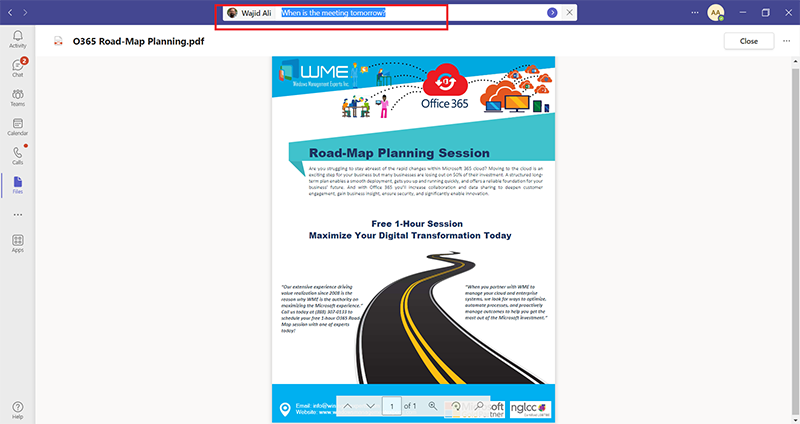
You can begin a chat message while working on private documents and reply to others without leaving the current view, so your workflow is not interrupted.
From the Team’s environment, you can also create new files or upload existing files right into your personal OneDrive cloud storage, allowing you to remain immersed in the Team’s environment.
Here’s how you create new OneDrive files in Teams:

Here’s how you upload files to OneDrive using Teams:

In fact, with the click of a button, you can access and open the complete OneDrive application which will allow you to access all your favorite features and capabilities of OneDrive.

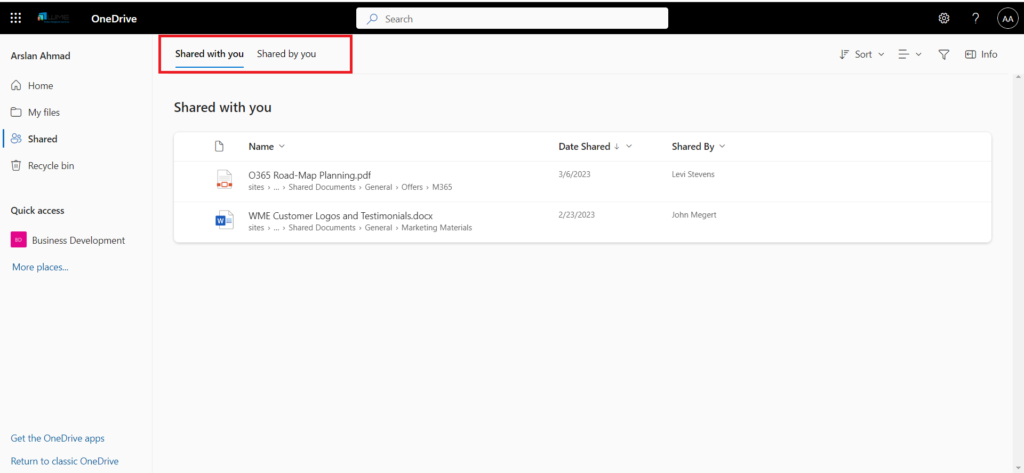
Now, you have landed on a OneDrive interface where you can also access items shared by you and with you.
You can also see the files’ version history. You can also access the details pane which shows you a history of a document and allow you to manage document access.
Also, when in OneDrive, you can quickly move or copy items into the Team’s environment. Select the ellipsis beside the folder or document and choose “Move to” or “Copy to”
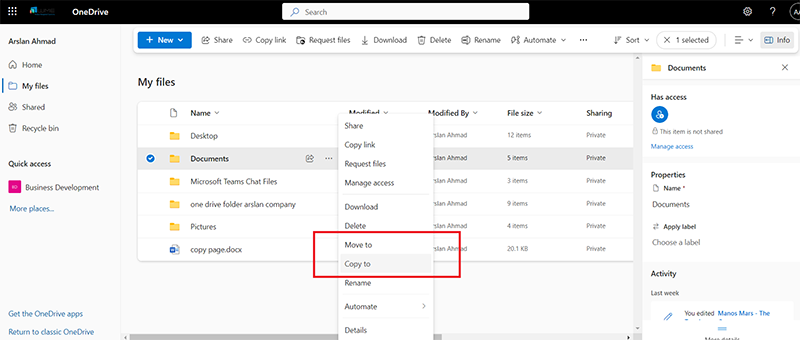
After this, a pane will open allowing you to select the Team’s workspace and drill down to the channel and folder you’d like the item to appear in.
If you choose to move an item, it will remove the item from its original location and relocate it to a new location that you’ve specified.
Whereas, if you choose to copy, it will create a replica of this item and place the replica in a new location that you’ve selected maintaining the item in its original location as well. However, if you’ve copied an item from one location to another, it’s important to note that these items are not synced to one another.
This functionality is also available in Teams if you’d like to move or copy items from a channel into your personal OneDrive storage. The steps are the same for this procedure as well.
If you want to be able to change and update a document from various locations, select the ellipsis and choose copy link.
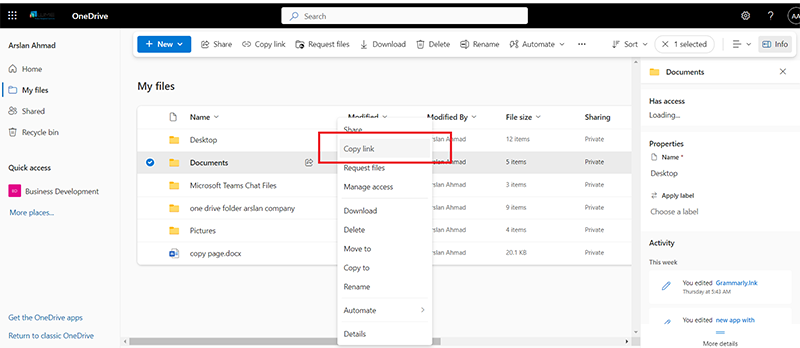
This link can be pasted into a channel post, a chat message, or into another Microsoft application such as OneNote. All changes made to a document using this link will be reflected in the original version.
Tip # 3: Save Posts and Messages for Later in Teams
From now onwards, never miss a post on Teams. As you and your colleagues add content to the post tab or to private one-on-one or group chats, items may go lost due to persistent chat, and you may have a hard time locating them back. So, it would be handy to save them instantly.
Saving content is also a great way to mark a specific position within a chat or conversation post.
So, if you want to ensure you always have access to an important message or post, you can save it for quick retrieval at a later time.
How to Save Posts and Messages in Microsoft Teams?
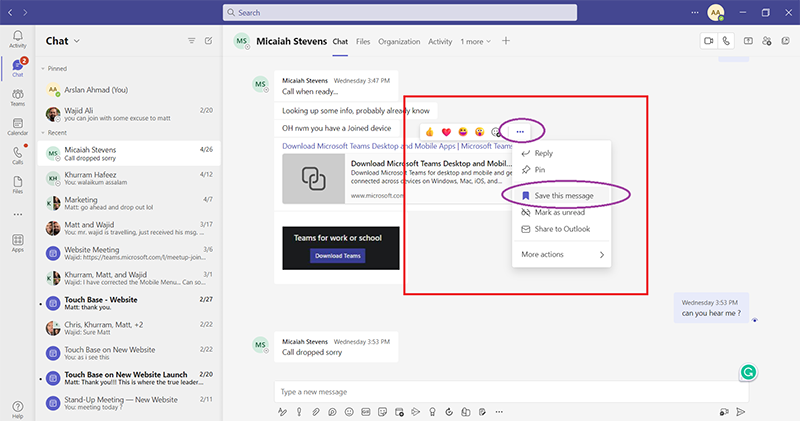
To save an item, hover over the post or chat you’d like to save,
select the ellipses and choose “save this message.”
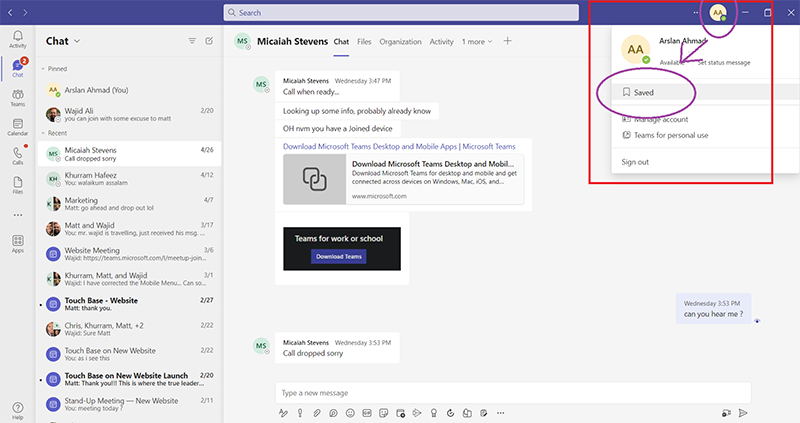
When you need to access this post in the future, you can select your profile icon and choose “Saved”
The Saved pane will open and you can click any of the saved items to review it. When a saved item is selected, you’re brought to its location and can review all posts placed before or after that saved item.
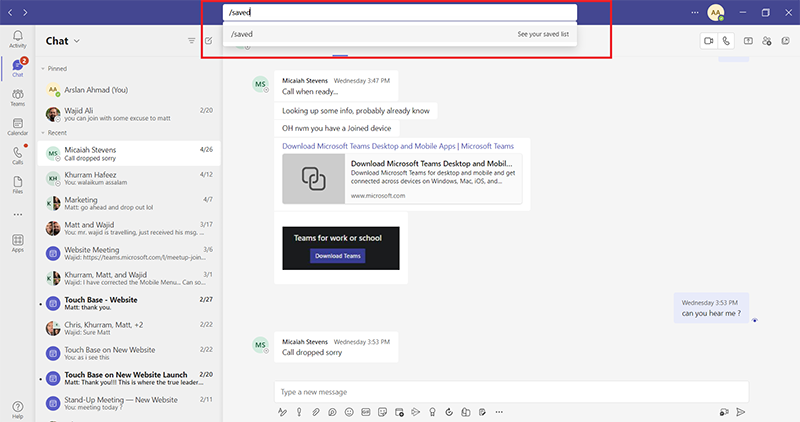
Another way to access Saved Pane in Teams:
To save time, you can also access your saved pane by navigating to the command bar and typing “/saved” and hitting Enter.
Note: It’s important to note that shared documents or files don’t necessarily need to be saved as they are accessible from the Files view of the channel or chat window.
Tip # 4: Pop out a Teams Chat to Stay Focused
If you pop out a chat window separately, you can still see and use it even if you switch to a different application or screen. It’s a helpful way to keep important conversations easily accessible.
Why you should Pop out a chat window:
- To be able to view the chat conversation in a separate window, which can be resized and moved around the screen as needed, providing greater flexibility and convenience.
- It makes multitasking easier. You can easily work on other tasks while keeping the chat window visible and easily accessible.
- You can view and respond to chat messages without having to switch between different tabs or windows in the Teams app or outside of the Teams app, improving efficiency and productivity.
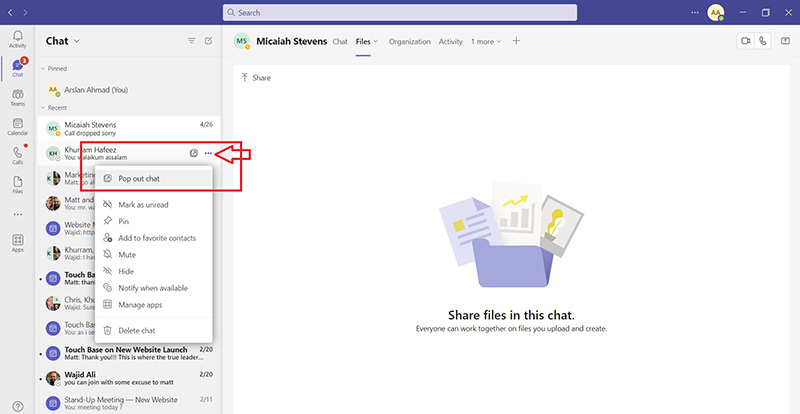
To pop out a chat window in Microsoft Teams, follow these steps.
Method #1:
1. Navigate to the chat you want to pop out.
2. Click on the three dots (ellipsis) icon located at the top right corner of the chat window.
3. Select “Pop out chat” from the drop-down menu.
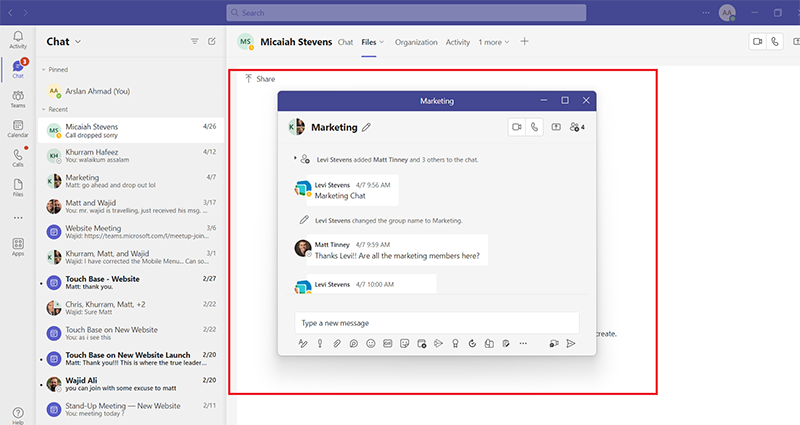
- The chat conversation will now open in a separate window. You can resize and move the window around the screen as needed.
Method #2:
From the chat listing, hover over the chat you’d like to pop out, and the pop-out icon will appear.

Click on it and the chat will pop out instantly. It will look like this:
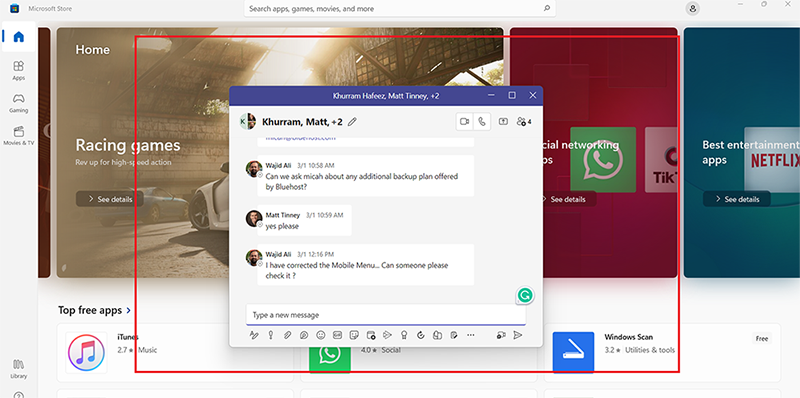
You can now resize and reposition the chat window anywhere on your screen.
As you move through the various application views in
Teams, the chat window will remain open.
You can also use this popped-out chat when you have other applications open on your desktop.
Method # 3:
Another way to access the pop-out feature is to double-click the profile icon of a user. This will pop open the private one-on-one chat window. Look at the example:
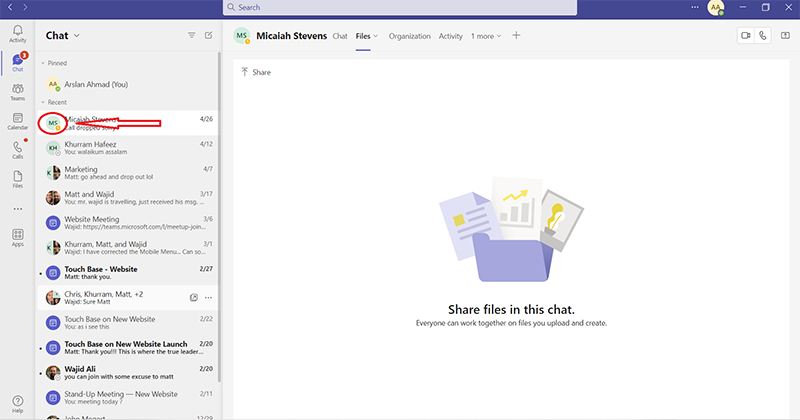
When you double click this icon, the chat will pop out.
Method 4:
Finally, you can use the shortcut “/pop” to pop out any chat window.
You need to type “/pop” in the search box in the top middle of the Teams app. When you type this and press enter, a drop-down menu like this will appear:
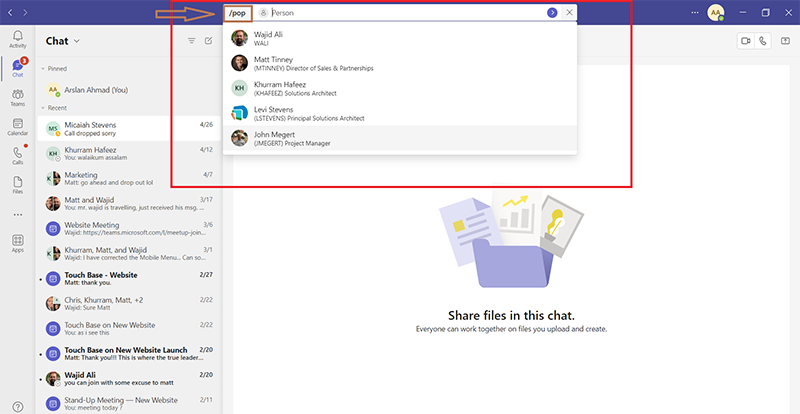
You can see some options already on the list. You can click any of these and the corresponding chat window will instantly pop out.
If you can’t find the user you’ve been looking for, you can simply type their username and then select them. It will work without any glitches.
Note: Currently, the pop-out feature is not available on the web version of Microsoft Teams or the Team’s mobile application.
Tip # 5: Save time with Cross-channel Postings
Our final tip to help you increase productivity is all about posting across teams and channels within teams.
Cross-channel postings allow you to create a single post or announcement and populate it through various channels that you’re a member of in teams.
But before that, let’s gather some clarity.
What are the channels on Microsoft Teams?
Channels on Microsoft Teams are a way to organize and categorize different conversations and collaboration topics within a team.
Each channel typically represents a different project, department, or functional area, and can include a variety of features such as chat messages, files, and apps.
Why is it important to post on different channels?
It is important to post in different channels in Microsoft Teams for several reasons:
- First, it helps to keep conversations and collaboration organized, which can be especially useful in larger teams with multiple projects or areas of focus. By using different channels for different topics, team members can easily find and participate in the discussions that are most relevant to them.
- Second, posting in different channels can help to reduce clutter and noise in the main team conversation, making it easier for team members to find and focus on the information that is most important to them.
- Finally, using different channels can also help to ensure that important messages and updates are seen by the right people, rather than getting lost in a sea of unrelated conversations.
All in all, using channels effectively can help to improve collaboration and communication within a team, leading to better outcomes and increased productivity.
Note: Posting on multiple channels is also referred to as cross-posting.
How to cross-post in Microsoft Teams?
- Once your message or post is ready, open Microsoft Teams and navigate to the channel where you want to create your message or announcement.
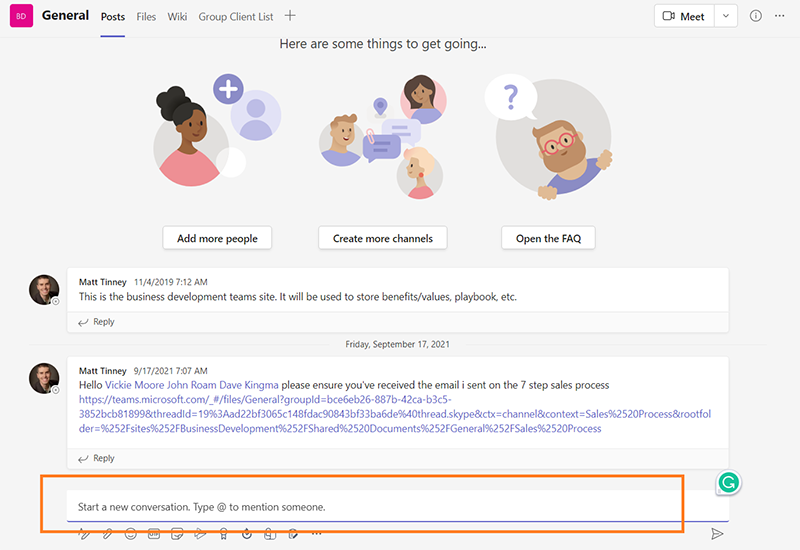
2. Paste or write your post by clicking on the “New message” box at the bottom of the channel.
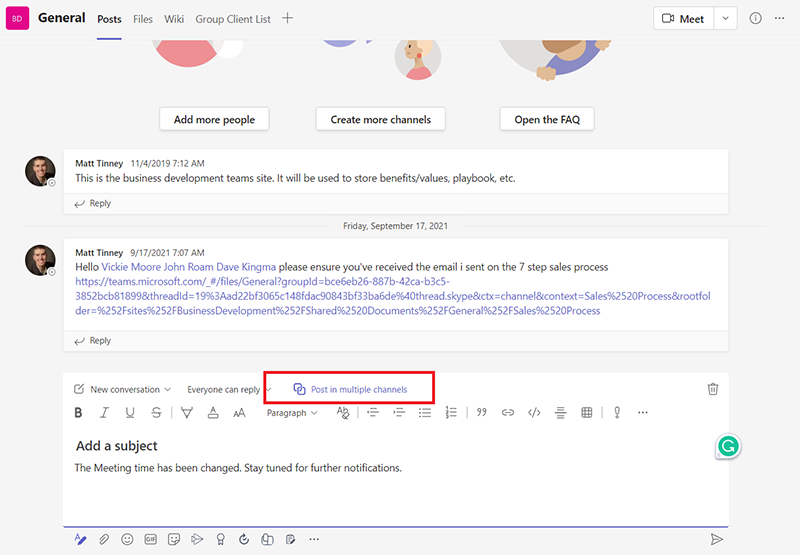
- Once you have written your message, click on the “Format” icon (it looks like a small “A” with a paintbrush next to it) located at the bottom of the message box.

- Select the “Post to multiple channels” option from the options that appear at the top of the chat box.
- You can see, the channel you created the post in will automatically populate here.
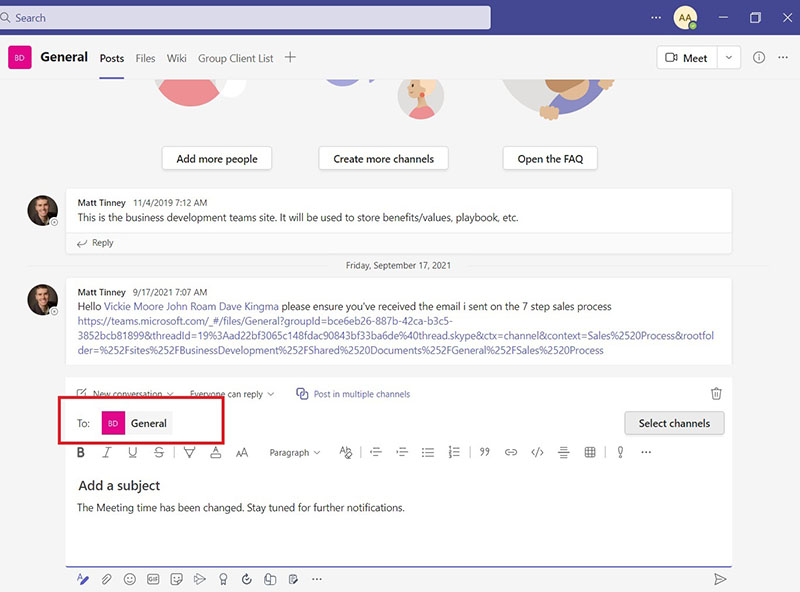
- Now click on the option on the right, “Select Channels.”
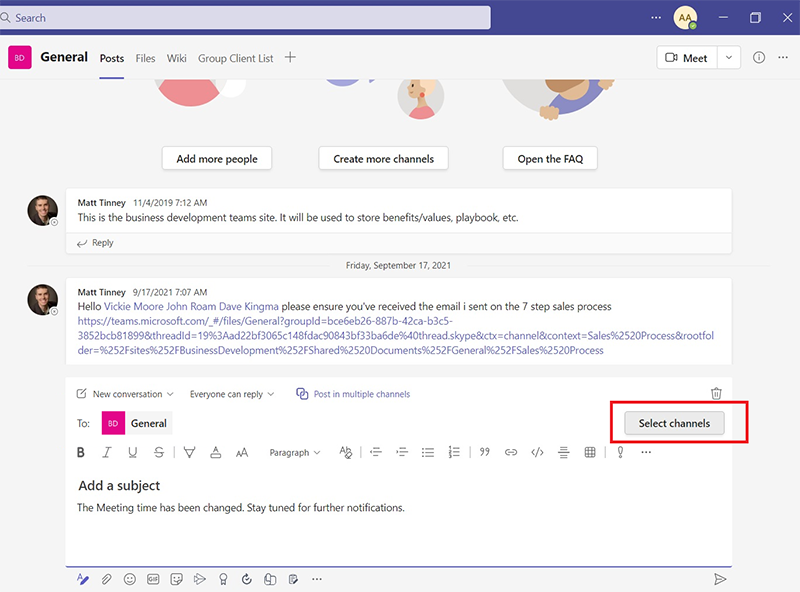
- A pop-up window will appear, allowing you to select the channels you want to cross-post your message to. You can select multiple channels.
- Once you have selected all the channels, click the “Post” button at the bottom of the pop-up window.
That’s it! You have successfully cross-posted your message to multiple channels in Microsoft Teams.
Wrapping it Up:
In conclusion, Microsoft Teams offers several useful features that can enhance your productivity and help you collaborate more effectively with your team.
By leveraging functionalities such as pinning chats and channels, using OneDrive connectivity, and saving posts and messages for later, you can streamline your workflow and save time. By adopting these tips, you can improve your efficiency and make the most of the tools available to you in Microsoft Teams.
If you would like to gain more insights into Teams productivity or if you need Professional Teams services for your environment, drop us a message: Sales@windowsmanagementexperts.com