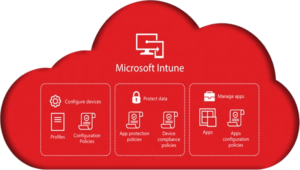
Now that we enrolled our Windows 10 devices into Intune in a previous blog post, we can start managing them – which means we can deploy apps, policies, scripts, software updates and do many other actions.
Let me start from application management first. Here is the list of actions we can do with Intune:
- Create and edit app categories
- Install, update, and remove apps
- Push and publish apps
There are various types of apps that you can deploy from Intune:
- Line-of-business (LOB) apps – .msi, .appx, .appxbundle, .msix, and .msixbundle
- Win32 apps – must be converted into the .intunewin format
- Microsoft Store apps
- Links on web apps
- Azure AD Enterprise Applications
- Microsoft Edge
- Microsoft 365 apps
In my very first example I want to show you how to publish apps. Users can manage their devices (wipe, retire, rename and some other options) and install published apps from Windows 10 Company Portal. We need to push Company Portal on our managed devices first, then we can publish applications.
To do that we need to integrate Microsoft Store for Business with our tenant. Open MEM console, go to Tenant administration, then Connectors and tokens. Click Enable on the Microsoft Store for Business page and sign in:
On the Microsoft Store for Business page search for Company Portal:
Click Get the app, then accept the agreement:
Go back to MEM portal and click Sync:
To check if Intune can synchronize apps from MSfB go to Microsoft Store for Business page, select Manage, then Settings and select Distribute:
If status is not Active, then click Activate. Come back on Tenant administration page, refresh and check if synchronization was finished successfully:
Lets deploy Company Portal on our users. Go to Apps – Windows and you will find a Company Portal synchronized from MSfB:
Click on app. Overview shows you this app was synchronized from WSfB and ready for deployment:
Select Properties and then edit Assignments:
On the group mode Required click Add group and select the user group we created before:
Click Select, then Review + Save and Save again. Now we see that application is assigned:
Then lets add a first line-of-business application. As an example I always prefer to install 7-zip because of file size and time.
Go to Apps – Windows and choose Add. Click on Line-of-business app and click Select:
On the next page you need to select the file for installation:
Choose the installation file from the directory and click Open. As you see I have the latest stable version of 7-zip x64 for Windows 10:
Click OK.
You will need to provide some basic information about the application I want to deploy like Name, Publisher, etc.:
Select User for App install context and No for Ignore app version. You will need to select Yes for applications that support self-updating like Google Chrome. I choose User because I want to publish this app, not push. If you choose Device then you can push the application or uninstall only, there is no publishing option for device. You can also highlight this app in the Company Portal if needed. In my example I leave Show this as a featured app in the Company Portal by default.
For Command-line arguments you need to provide parameters for silent installation. Because it’s simple .msi file you can provide /qn.
You can choose a category for your application:
It’s better to have a logo for applications in Company Portal to make it more native and useful for users so I choose Select image:
You need to browse the directory and select logo:
Click OK, then click Next.
On the Assignment page in group mode Available for enrolled devices click on Add group, choose user collection for deployment, and click Next:
Then click Next. Check the summary page and click Create:
Wait for a confirmation that the application is uploaded:
We targeted Company Portal as the required application and published 7-zip. You can wait a couple of hours (Windows 10 policy refresh cycle is 8 hours) or you can force policy synchronization from the MEM console. To do that go to Devices – Windows:
Click on device name and select Sync:
Then confirm you want to initiate policy synchronization:
After couple of minutes, we see the result:
Now we can run Company Portal:
Click on 7-zip and Install it:
After 1 minute we see the result:
If you open Downloads & updates you will see the status of installed apps and in column Required by your organization you see the difference between required Company Portal and published 7-zip:
After some time you can track application deployment status. For example, lets check Company Portal deployment progress. On the application page we see dashboards with the overall status:
As you remember we deployed Company Portal on Azure AD user group. So we see that one user successfully installed an application:
And we see computer names with the installed application:
In the next blog I will explain how to package Win32 applications for Intune!
As always, if you have any issues our experts are here in real-time to help. You can send us an email.


