A new feature within Azure AD Privileged Identity Management (PIM) allows you to use PIM to control group membership. Like standard PIM- where administrators are given “eligible” assignments to roles rather than active assignments, Azure PIM for groups makes users eligible for group membership, rather than always a member of the group. Users would use PIM to activate their membership in the group.
NOTE: As of this writing, this feature is still in Preview.
Preview features are fully supported by Microsoft but may still have a few bugs or lack a few features that will be taken care of by GA release.
Azure PIM: Use Case #1
A good use case for this new Azure feature is to create bundles of RBAC roles to allow your admins to activate membership of a single group and activate several AAD RBAC roles.
Example #1:
An example of this may be any role plus the Service Support Administrator. This would make it so that your admins do not have to activate multiple roles every day.
Example #2:
Another example may be a bundle of all the Microsoft 365 platform roles like
- Exchange Administrator,
- Office Apps Administrator,
- SharePoint Administrator,
- Teams Administrator
into one activation.
Azure PIM Use Case #2
Another use case for this is sub-RBAC roles within services that are still assigned directly to users and do not have PIM roles.
Example:
An example of this is the sub-roles in Exchange or Microsoft Purview. Some of these are high impact and should only be active when needed, such as the ability to search and purge email in Exchange.
Azure PIM for Groups: Use Case #3
Finally, PIM for groups can be used to control owners and members. So, another use case for this is have a user always as a member of a group, but if they need to do perform an owner task, they must active the owner role. This allows for a separation of roles.
1. Global Admins Role
Do not use this feature for the assignment of Global Administrator in Azure AD. The Global Administrator role should only be directly assigned to administrators (NEVER use a group) and should always use standard Azure AD PIM.
2. Create PIM-Enabled Group
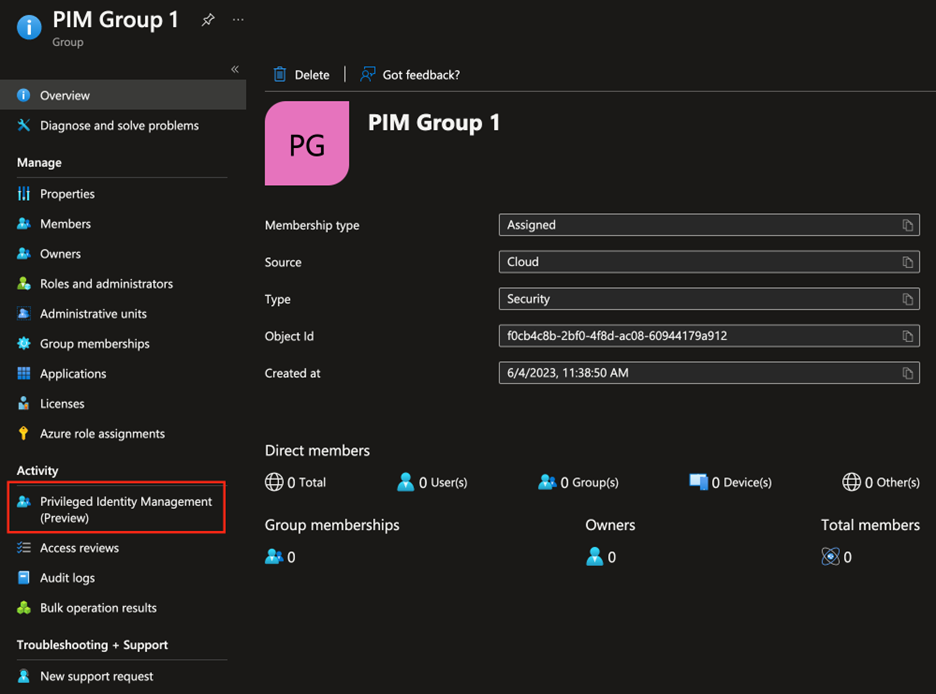
PIM can be enabled on any cloud-based Azure AD security group. It cannot be enabled directly on a synced group, but there is a workaround we’ll talk about later. From the group’s page in AAD, select Privileged Identity Management from the left-pane.

- Click the button Enable Azure AD PIM for this group.
- From here, this should look like a standard PIM assignment screen. You can add Active or Eligible assignments by clicking Add Assignments. Users or other groups can be added as eligible or active.
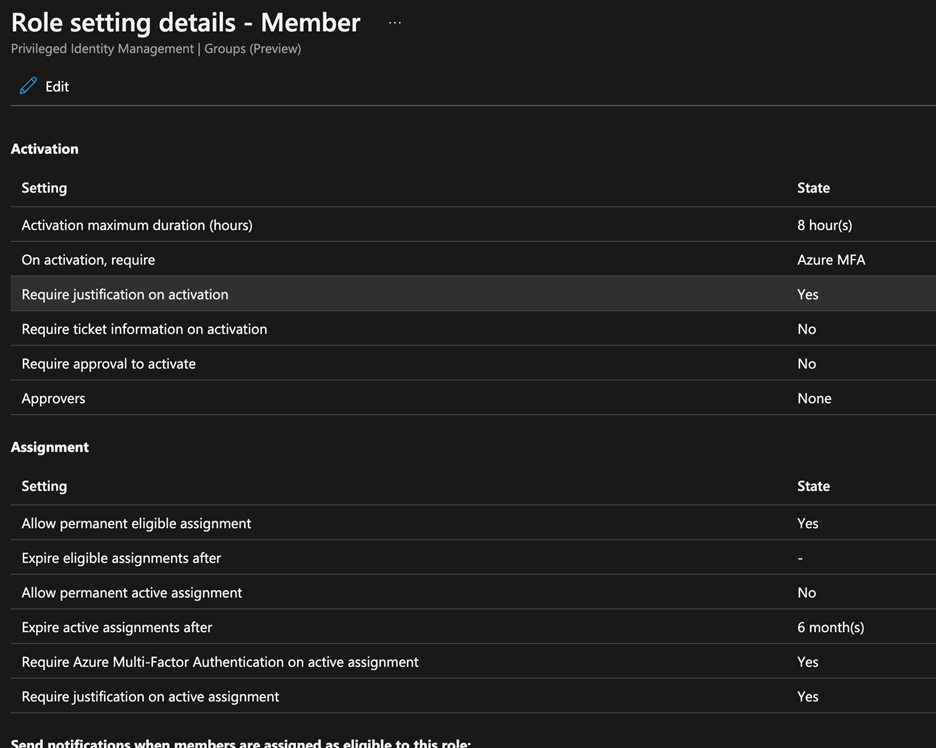
Note: Each group has its own set of PIM Settings. Set these on each group by clicking Settings. There are also different settings for Owner and Member.

3. Synced Group
Normally, synced groups cannot be used in PIM assignments because synced groups cannot have security roles assigned to them in AAD.
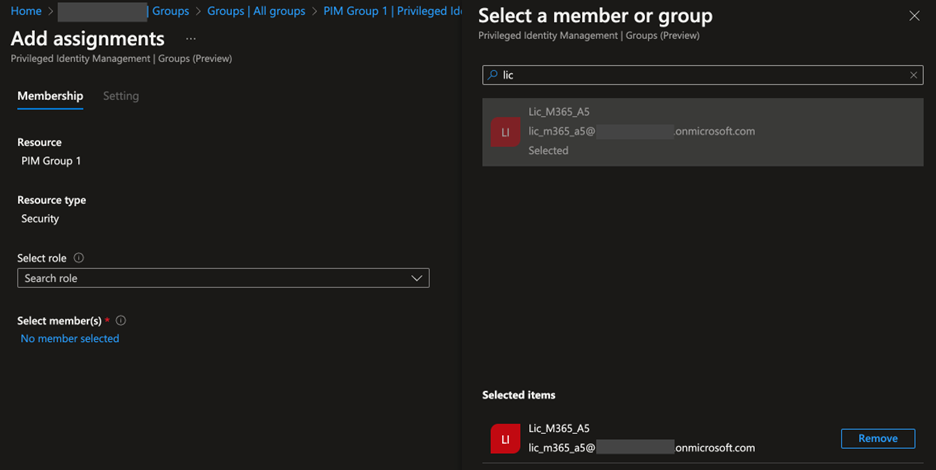
This new feature provides a workaround for this by allowing a synced group to be added as an eligible assignment.
In the previous screenshot, PIM Group 1 is a cloud group. When I click Add Assignments to create a new PIM assignment and click Select Members to add an object to the group, all groups are available.
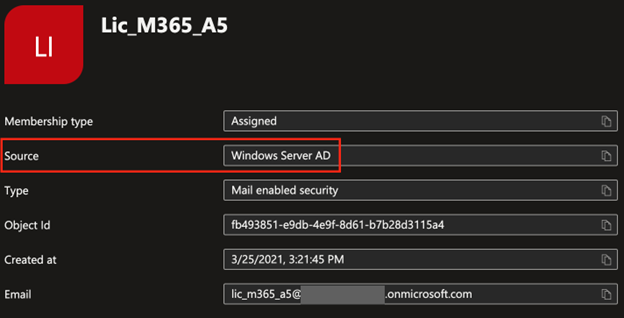
In my tenant, the group Lic_M365_A5 is a group I sync from on-prem that I use for licensing.

When I go to add an eligible assignment to PIM Group 1, this group is an option to add.

This allows you to now use synced groups in RBAC assignments.


